弄清楚如何在您的 Python 和 Bottle 开发环境工作流程中使用 Docker 容器可能会让人感到困惑。本教程将快速向您展示获取 Dockerup 并在 macOS 上运行一个工作的 Bottleweb 应用程序的确切步骤
我们的工具
本教程是为 Python 3 编写的。它可能适用于 Python 2,但尚未在即将弃用的 2.7 版本上进行测试。你真的应该使用 Python 3,最好是当前的最新版本 3.6.5。
Docker for Mac 是运行 Docker 容器所必需的。我建议您使用稳定版本,除非您对边缘通道有明确的用途。
在 Docker 容器中,我们将使用:
- Python 3,特别是来自 Docker Hub 的 slim-3.6.5 版本
- Bottle 版本 0.12.13
Dockerfile 和 Bottle 项目的所有内容都可以在 GitHub 上的博客代码示例存储库的 docker-bottle-mac 目录下的 MIT 许可下开源获得。
在 macOS 上安装 Docker
我们必须先安装 Docker,然后才能启动我们的容器。如果您已经安装了适用于 Mac 的 Docker 并在您的计算机上运行,请跳至下一部分。
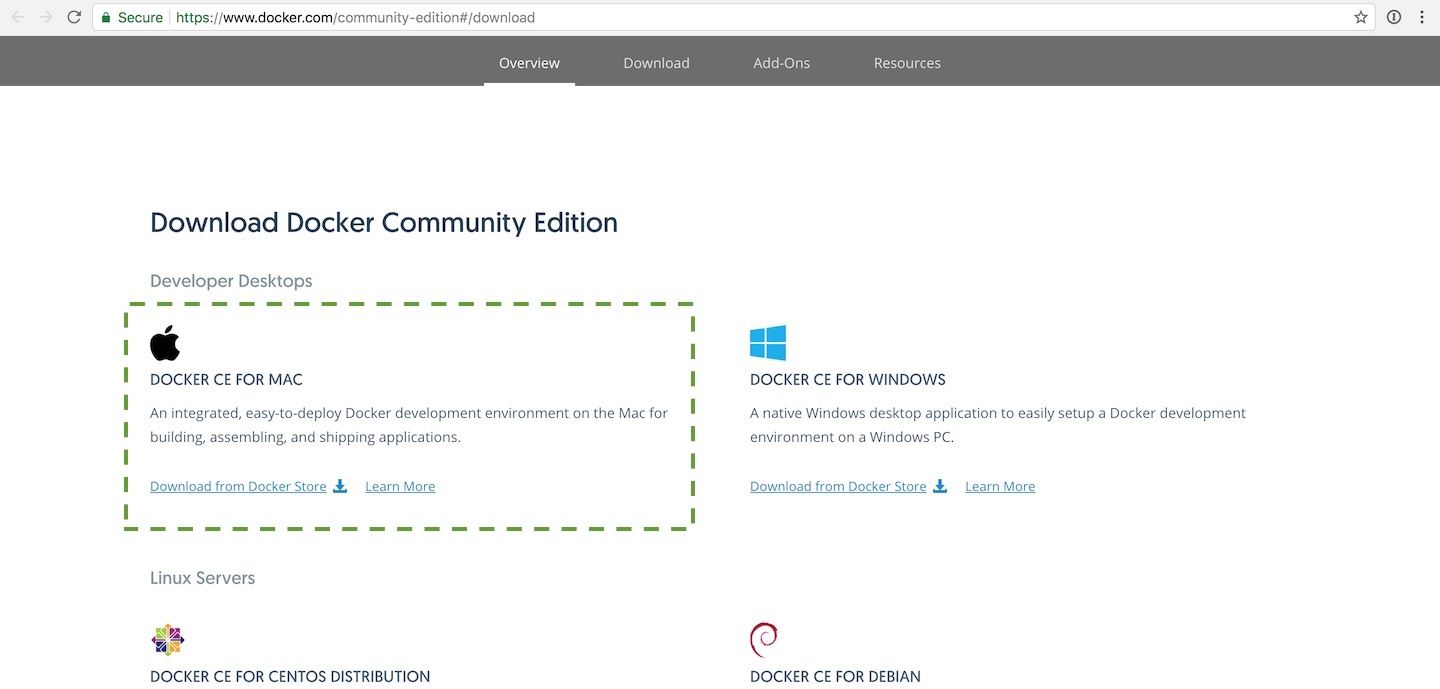
在您的 Mac 上,下载适用于 Mac 安装程序的 Docker 社区版 (CE)。
打开 Finder 并转到安装文件所在的下载文件夹。按照安装步骤进行操作,并在安装程序完成后打开终端。
通过运行 docker 命令和 --version 标志来测试您的 Docker 安装:
docker --version
如果 Docker 安装正确,您应该会看到以下输出:
Docker version 18.03.1-ce, build 9ee9f40
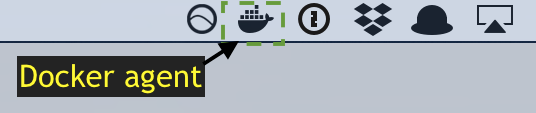
请注意,Docker 通过您可以在菜单栏中找到的系统代理运行。
Docker 现已安装,因此我们可以运行容器并编写一个 simpleBottle 应用程序来测试在容器内运行应用程序。
Docker文件
Docker 需要知道我们在容器中需要什么,因此我们使用 Dockerfile 指定图像。
# this is an official Python runtime, used as the parent image
FROM python:3.6.5-slim

# set the working directory in the container to /app
WORKDIR /app

# add the current directory to the container as /app
ADD . /app

# execute everyone's favorite pip command, pip install -r
RUN pip install --trusted-host pypi.python.org -r requirements.txt

# unblock port 80 for the Bottle app to run on
EXPOSE 80

# execute the Flask app
CMD ["python", "app.py"]
保存 Dockerfile 然后在命令行运行:
docker build -t bottledock .
上面的docker build文件使用了-t标志来标记名称为bottledock的图像。
如果构建成功,shell 将显示一些已完成的输出,如下所示:
$ docker build -t bottledock .
Sending build context to Docker daemon  16.38kB
Step 1/6 : FROM python:3.6.5-slim
3.6.5-slim: Pulling from library/python
f2aa67a397c4: Pull complete
19cc085bc22b: Pull complete
83bd7790bc68: Pull complete
8b3329adba1b: Pull complete
d0a8fd6eb5d0: Pull complete
Digest: sha256:56100f5b5e299f4488f51ea81cc1a67b5ff13ee2f926280eaf8e527a881afa61
Status: Downloaded newer image for python:3.6.5-slim
 ---> 29ea9c0b39c6
Step 2/6 : WORKDIR /app
Removing intermediate container 627538eb0d39
 ---> 26360255c163
Step 3/6 : ADD . /app
 ---> 9658b91b29db
Step 4/6 : RUN pip install --trusted-host pypi.python.org -r requirements.txt
 ---> Running in f0d0969f3066
Collecting bottle==0.12.13 (from -r requirements.txt (line 1))
  Downloading https://files.pythonhosted.org/packages/bd/99/04dc59ced52a8261ee0f965a8968717a255ea84a36013e527944dbf3468c/bottle-0.12.13.tar.gz (70kB)
Building wheels for collected packages: bottle
  Running setup.py bdist_wheel for bottle: started
  Running setup.py bdist_wheel for bottle: finished with status 'done'
  Stored in directory: /root/.cache/pip/wheels/76/a0/b4/2a3ee1a32d0506931e558530258de1cc04b628eff1b2f008e0
Successfully built bottle
Installing collected packages: bottle
Successfully installed bottle-0.12.13
Removing intermediate container f0d0969f3066
 ---> 0534575c8067
Step 5/6 : EXPOSE 80
 ---> Running in 14e49938d3be
Removing intermediate container 14e49938d3be
 ---> 05e087d2471d
Step 6/6 : CMD ["python", "app.py"]
 ---> Running in ca9738bfd06a
Removing intermediate container ca9738bfd06a
 ---> 9afb4f01e0d3
Successfully built 9afb4f01e0d3
Successfully tagged bottledock:latest
我们也可以用docker image ls 命令查看图片。现在试试看:
docker image ls
我们的标签名称应该出现在图像列表中:
REPOSITORY          TAG                 IMAGE ID            CREATED             SIZE
bottledock          latest              9afb4f01e0d3        About a minute ago   145MB
我们的图像已准备好作为容器加载,因此我们可以编写一个 shortBottle 网络应用程序进行测试,然后进行进一步开发。
编写 Bottle Web 应用程序
是时候编写一个简单的“Hello, World!”风格的 Bottle 应用程序,以在我们的 Docker 容器中测试运行 Python 代码。在当前项目目录中,创建一个名为 app.py 的文件,内容如下:
import bottle
from bottle import route, run


app = bottle.default_app()


@route('/')
def hello_world():
    return "Hello, world! (From Full Stack Python)"


if __name__ == "__main__":
    run(host="0.0.0.0", port=8080, debug=True, reloader=True)
上面的代码返回一个简单的“Hello, world!”由 Bottle 开发服务器执行并由客户端联系时的消息。
我们只需要一个文件来指定我们的 bottle 依赖项。在与 requirements.txt 相同的目录中创建一个 app.py 文件:
bottle==0.12.13
确保 app.py 和 requirements.txt 文件都已保存,然后我们可以尝试编写代码。
运行容器
现在我们已经有了图像以及文件中的 Python 代码,我们可以使用 docker run 命令将图像作为容器运行。执行以下命令,确保将卷的绝对路径替换为您自己的目录。
docker run -p 5000:8080 --volume=/Users/matt/devel/py/blog-code-examples/docker-bottle-macapp bottledock
如果您收到错误python: can't open file 'app.py': [Errno 2] No such file or directory,那么您可能没有将/Users/matt/devel/py/bottledocker更改为项目文件所在的目录,尤其是app.py,位于。
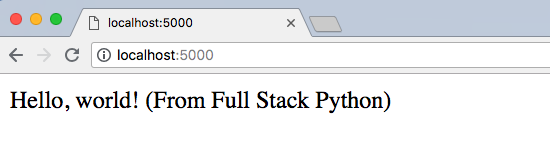
当您看到一个简单的基于文本的 HTTP 响应时,一切正常,就像上面我的 Chrome 浏览器屏幕截图中显示的那样。
下一步是什么?
我们刚刚安装了 Docker 并编写了一个 Bottle 网络应用程序以在容器内运行。这只是如何将 Docker 集成到您的工作流程中的开始。
接下来查看 Bottle、Docker 和部署页面以获取更多教程。
有问题吗?在 Twitter@fullstackpython 或@mattmakai 上通过 Full Stack Python 存储库上的 GitHub 问题票让我知道。
您是否在这篇博文中发现了拼写错误、语法问题或其他令人困惑的地方?在 GitHub 上分叉此页面的源代码并提交带有修复的拉取请求或在 GitHub 上提交问题单。
